| Your browser is not supported. | ||
|
Please browse our site using any of the following options:
| ||


How To Modify Lures

Starlo offers some valuable intel' on modifying, customising and otherwise pimping your favourite lures - hard and soft - to improve their catch rates.
Like so many other keen anglers, I own a heck of a lot of lures. I've been buying, using, swapping, giving away, occasionally selling and sometimes losing lures for 50 years or so.
As you can imagine, over this time my collection has grown far beyond any logical bounds or rational needs. I'm sure that well over three quarters of the lures now in my possession are unlikely to ever see serious action again.
Many are buried away in tackle trays on dusty storage shelves, while some hang on a sheet of peg board in my shed that theoretically serves as the rotation bench for my frontline team of day-to-day choices. However, when it comes right down to it, there are probably only 20 or 30 hard bodied lures that regularly get a run, along with a couple of trays of soft plastics and jig heads. These are what our American friends (and an increasing number of Aussies) might call my "go-to" lures.
Put simply, I fiddle about a fair bit with my favourite lures. Exactly how much impact this fiddling has on my actual strike rate is something I can never know for certain, but what I do know is that all of that tweaking and fine-tuning dramatically increases my own faith in what I have tied to the end of my leader. In the end, that confidence is important.
Hardware wars
A lot has been written and spoken over the years about the need to upgrade lure hardware to suit Australia's tough fish and demanding environments, and there's a fair bit of truth in that. Imported lures designed primarily to target trout, American bass, walleye, pike or perch are often found sadly wanting when it comes to barramundi, mangrove jacks or Murray cod.
For many years, serious Aussie lure users - especially those fishing in our northern waters for barra and other tropical species - simply removed the standard lightweight hooks and rings these hard-bodies arrived with and replaced them with much stronger and heavier hardware. This became almost a reflex action, and few of us ever questioned it. But it's not always the best way to go.
The fact is, very few lures ever swim quite as well or pin fish as effectively with upgraded heavyweight hooks and rings as they do with their original, factory-fitted hardware.
There are several reasons for this. Firstly, good lure makers spend a lot of time precisely balancing all the fittings and fixtures on their products to achieve each lure's optimum action and buoyancy. Secondly, those factory-fitted hooks are typically fine gauge and ultra-sharp, which equates to improved hook-up rates. Whether they also have the strength and structural integrity to keep you connected to a fish long enough for it to be landed is, of course, a moot point!
But hanging thick, over-engineered hooks and rings on a finely-balanced lure can have a couple of highly undesirable results. Firstly, this heavy hardware can dramatically sandbag the lure's action. Secondly, the new hooks and rings will definitely alter the lure's buoyancy, potentially turning a floater into a sinker (or even a stinker!).
Finally, those thick hooks - no matter how sharp - will never penetrate as readily as finer gauge models, meaning you'll miss at least some of the strikes you'd otherwise have pinned.
Of course, that's all academic if the first barra to engulf your shiny new lure turns your hooks into pretzels and your rings into bent paper clips before disappearing down the river with one last gill-flaring victory leap, apparently intended to mock your defeat! Getting them on is one thing, getting them out is another.

Balancing modified lures
Since accepting this conundrum of balancing finesse and strength in lure hardware, I've spent an inordinate amount of my time and effort attempting to find the perfect solution.
In reality, it doesn't exist and we'll be forever walking the fine line between those extremes. But I can tell you that I no longer automatically reach for the thickest rings I can fit through a lure's eyelet, nor the heaviest hooks on the tackle shop shelf.
Winning these endless hardware wars can involve some clever balancing of many variables. It might mean completely removing one set of hooks and rings from a lure, or using different sizes for the front and rear trebles. It could even involve switching to in-line singles or doubles instead of standard trebles.
It might also mean accepting that you'll need to run slightly lighter drag settings to avoid straightening fittings, or build some more stretch into the system via longer leaders, or by running nylon or fluorocarbon straight through, instead of braid… Or it could just come down to accepting that you'll suffer the occasional failure and loss as a trade-off for more hookups in the first place. But what it definitely doesn't mean is an automatic change to the heaviest possible hardware.
Test your lures
In the final analysis, there's no substitute for spending time test swimming and fine tuning your hard-bodied lures, especially as you begin to tweak them in any way. Not only will this teach you a lot about the behavior of each lure in the water, it'll also show you when you get it wrong and wreck the action of the lure by adding too much weight or bulk.
A swimming pool makes a wonderful lure testing tank, but so does any stretch of reasonably clear water. I've even used the bath at a push! However, one thing to bear in mind is the varying density of salt and freshwater. A lure that just floats in the salt may sink slowly in less dense freshwater. This is a factor worth considering.
The other important purpose for test swimming lures is to tune those that aren't swimming properly. Floating/diving plugs and minnows, in particular, can go out of tune and begin swimming off to one side or the other. It's often relatively easy to fix this by very gently bending the front eyelet or tow point with a pair of long-nosed pliers.
Tiny adjustments are usually all that's needed. If you come across a lure that simply refuses to run properly, despite tweaking, chances are you've found a dud that was never any good, that the bib itself is damaged or out of whack, or water has leaked into the lure.
The importance of lure colours
I'm often asked to rate the importance of colour in lure selection, and over time I've developed a stock response to that query. It goes something like this: "Colour isn't usually all that important, but when it is important, it can be critical!"
In other words, in my humble opinion, colour isn't very often the single key in successful lure selection… but on those relatively rare occasions when it makes a difference, colour can make a huge difference.
We've all been in that boat or on that stretch of bank where one colour or even one particular shade of colour out-fishes everything else. Not having that tone in your collection is a bad situation to find yourself in. This is one reason those of us who are serious about our lure fishing amass such large and diverse collections of hardware in every hue of the rainbow. You just never know when that day will dawn on which purple or pink or puce or passion fruit pavlova is the killer colour!
For example, some switched-on trout chasers have been adding bright, pea-sized red spots with lighter-coloured halos to their minnows, plugs and spoons for years, especially when fishing the pre-spawn and post-spawn runs of trout in autumn and spring. I first helped to popularise this customised colouration four decades ago, and gave it the name "spotted dog" in my writings.
That label has stuck, and has even been picked up by a few commercial lure makers. But I certainly can't claim to have "invented" the spotted dog pattern. In fact, it was first shown to me by a very canny Finnish trout fisher named Erkki Norell in the early 1980s, and it had been used in his home country (with great success) for at least a generation or two prior to him telling me about it. There is very little under the sun that's truly new!
The spotted dog pattern works because it mimics the flank markings of mature, pre-spawning brown trout and apparently triggers territorial aggression in other pre-spawn trout. It is one of those rare examples of a colouring tweak that can dramatically increase your catch rates, at least when used in the right place at the right time.
No hard rules
I wish there were more hard rules for colour selection when lure fishing, but there aren't. The best I can give you are some broad guidelines. For example, I tend to use natural, neutral, life-like and fairly subdued tones in very clear water, brighter colours in dirtier water and very dark, solid colours like black, midnight blue or purple at night and in filthy water. There are sound principles behind those general rules of colour selection, but they should never be regarded as more than a starting point and a basis for experimentation and observation. Exceptions abound.
One way to free up your choices in the colour selection department is to carry some form of marker pen collection, or a couple of fast-drying dyes, and to make and test colour modifications right there in the field.
Most permanent marker pens will colour both hard bodies and soft plastics, although it can be difficult to add significant changes and variations to lures that originally have a dark-based colour scheme. Just as in house painting, it's easier to put dark over light than vice versa. For this reason, anglers with an urge to try some on-water customisation would do well to consider packing some white lures or other light colours in their kit. These provide an ideal base for creative customisation.
Less is more when it comes to lure mods
My best advice when using these purpose-made pens and dyes to modify and customise your hard and soft lures is to tread gently and use only subtle applications of after-market colouration. Think in terms of adding highlights and features, rather than a total re-paint. Sometimes, less is more. It's also desirable to maintain the translucency and semi-transparency that is so often a feature of highly productive lures, especially softies. Don't make them opaque with an overly heavy application of marker dye.
Adding a flush of colour to the tail or gill area of an artificial bait can sometimes work wonders. So, too, can the addition of lateral lines, gills, spots, scale patterns and brighter eyes. Where these pens and dyes really come into their own, however, is on those occasions when the fish are showing a clear preference for a particular tone that you don't happen to have in your lure collection. That's the time to grab a white, clear or pale lure and paint it up to match the hatch.
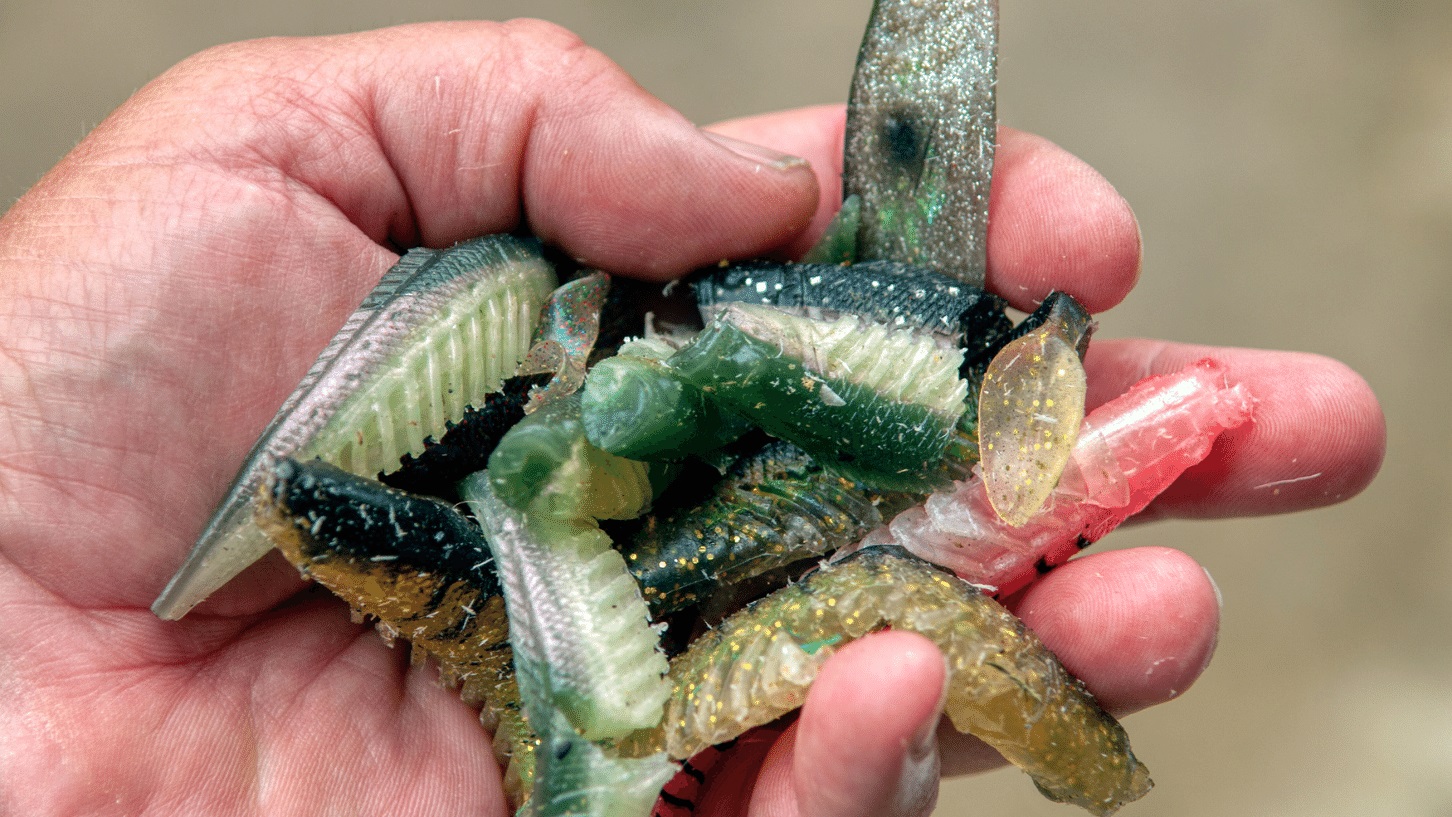
Cutting soft plastics
Actually taking a pair of sharp scissors or a craft blade to your soft plastic tails and modifying their size and shape requires a greater leap of faith than painting a few spots and stripes on a lure. However, once you've made that first chop or slice, it gets easier!
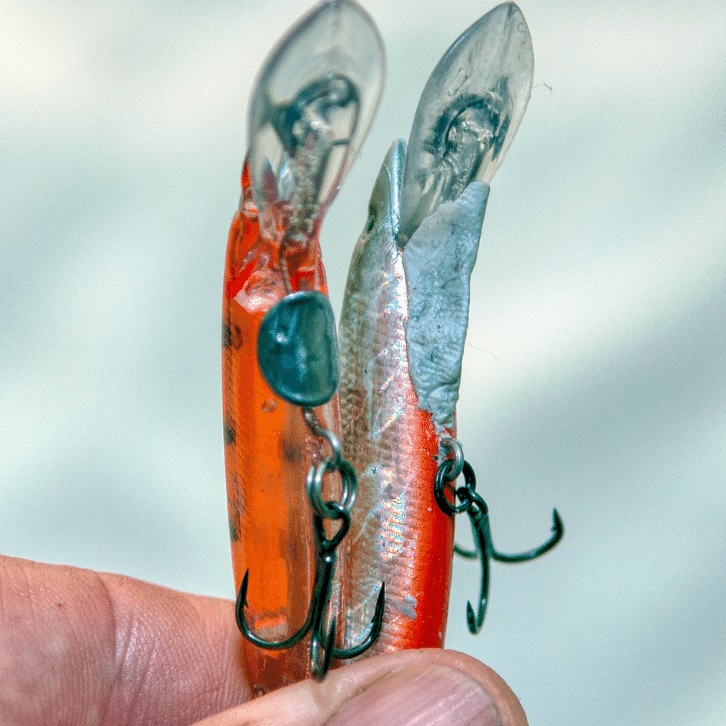
That first cut is often forced on us by expediency. As the old saying goes: necessity is the mother of invention. We may be running low on a particular tail that's catching fish and suddenly find that the one we have left is becoming a bit too old, tired and torn to stay on the hook or jig head properly. Instead, it keeps sliding down and bunching up in the bend of the hook, rendering it next to useless as a fish-catcher.
One of the best ways to fix this common problem (beyond super gluing the plastic back into position, which also works) is to carefully remove the tail from the hook and trim a short length from its head or nose. This allows us to re-thread the plastic with the hook travelling along a slightly different internal path, fixing the slipping problem and effectively giving the lure a second life.
One thing you may notice as you begin shortening plastics in order to get a second or third life out of them is that you're also reducing their overall profile and marginally speeding up their sink rates. That's because, as a rule of thumb, smaller and less water-resistant tails drop through the water column a little quicker on the same jig head than bigger, bulkier plastics which act like little parachutes to slow the sink rate.
These changes could be either good or bad things, depending upon where you're fishing and what you're chasing. Either way, those changes in the behaviour of a tail as you trim it back should be starting to give you some clues about where we're going next…
Downsizing
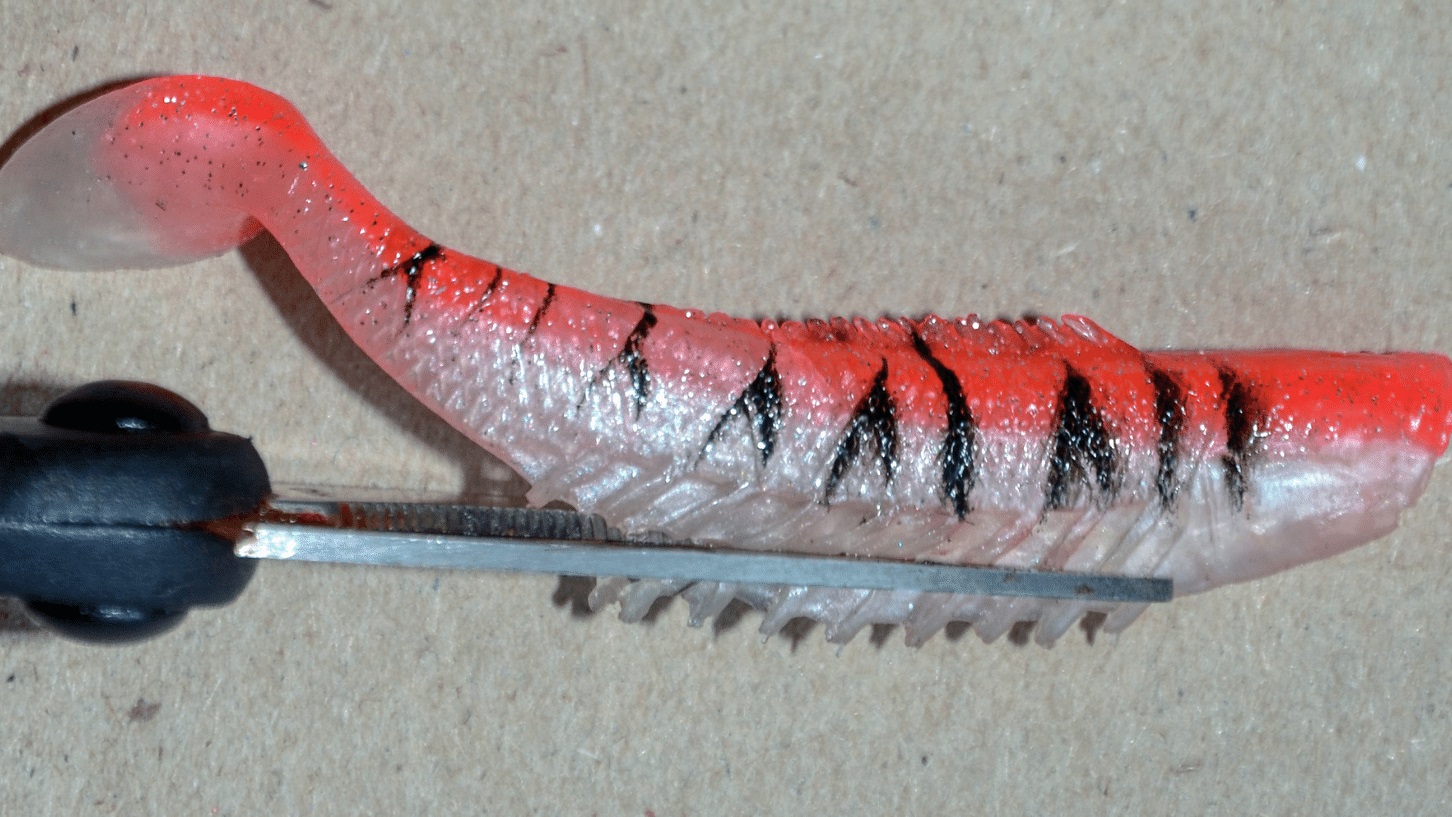
One of the commonest pieces of customisation I perform on any soft plastic tail (after shortening it as just described so I can create a new hook path and thus extend its fishing life) is to give it what I call the "Jenny Craig treatment". This, of course, refers to the famous weight loss program of the same name!
To "Jenny Craig" a plastic, I'll simply take my braid scissors or a sharp blade and carefully trim a little 'meat' from it. Typically this begins by snipping away any fins or other dangly bits, then going a step further and cutting away a slice of the belly and, if necessary, the back of the plastic.
With a little creativity and some careful nip and tuck work, it's possible to significantly alter a tail, both in appearance and behaviour. You can turn a fat grub into a worm, a deep-bodied shad into a thin profile baitfish or a chubby yabby into an anorexic shrimp! You'll also notice that lure's action and sink rate changes a little as you make these adjustments.
As you can imagine, there are practical situations where such relatively simple transformations to a soft plastic lure can work wonders in terms of your strike and catch rates.
One common scenarios calling for a little creative plastic surgery occurs when we find ourselves chasing aquatic predators that are quite clearly feeding on much smaller or thinner prey items than the lures we have in our tackle box. Trout (especial sea-runners and some lake-dwelling fish ) periodically become fixated on chasing thin-bodied smelt or whitebait. But bass, barramundi, saratoga, Australian salmon, kingfish and even the smaller tunas can also become surprisingly single-minded about dining on small, thin-bodied baitfish at times.
Being able to cut our lures down accordingly can sometimes spell the difference between a blank day and an absolute blinder under these trying circumstances. That's when the Jenny Craig approach really comes into its own.
There are many other interesting modifications that can be made with both soft and hard lures, but we'll save that for another time.
Meanwhile, don't be afraid to give lure tweaking a crack yourself. The results can be both satisfying and extremely rewarding.
Find your local Anaconda store and check out our extensive range of fishing gear.
